Pentax Astrotracer Post-processing Technique
The Pentax Astrotracer is a great feature that allows some star tracking which means no star trails, instead you can capture fainter light more clearly by extending shutter speed, and not bumping ISO right up high. The tricky bit is when you incorporate landscape elements in the image, as the Astrotracer will hold the stars steady, but instead the earths rotation is captured meaning your landscape elements (horizon etc) are blurred!
This article is a step by step guide to making the most of Astrotracer by combining two images – one with the astro tracer on and one with it off to capture a stunning starfield above your favourite location.

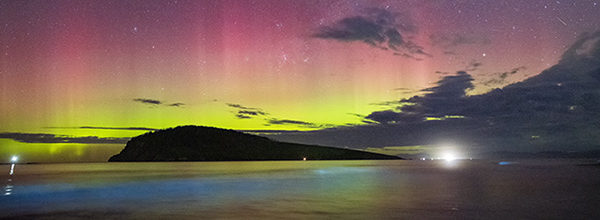
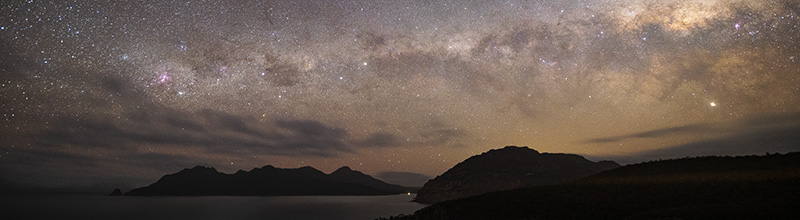
90 second exposure. Pentax K1, 15mm, f2.8 @ ISO1600.

Crop of the image above – stars are nice sharp points of light, while the horizon has moved/blurred.
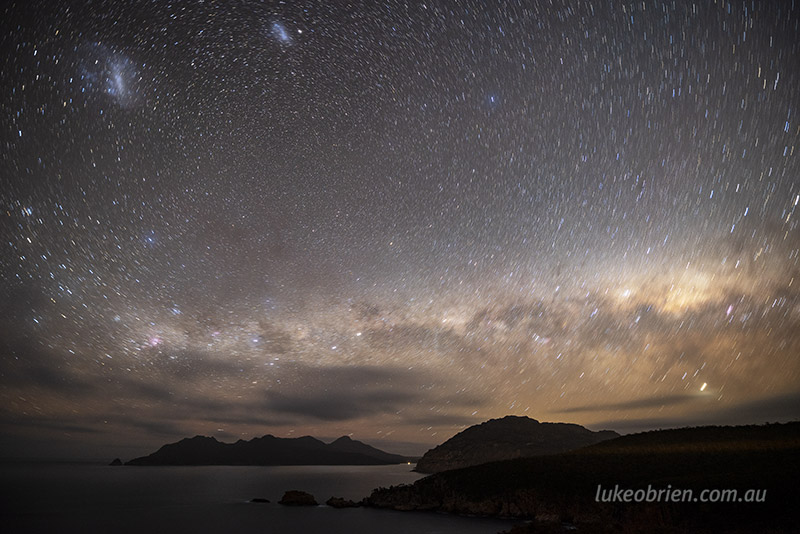
The same shot without Astrotracer means the horizon is sharp and the stars have trailed.
Step 1 – in the field – shoot 2 identical shots, one with Astrotracer on, one with it off. With Astrotracer switched on our stars will be still, but the horizon will have moved and be blurry. This is the image we will use as our background layer in photoshop. With the Astrotracer switched off our stars will trail, but the horizon will be nice and straight – this is the image we will copy and paste over our background image of nice still stars. It will be named “Layer 1” automatically in PS.
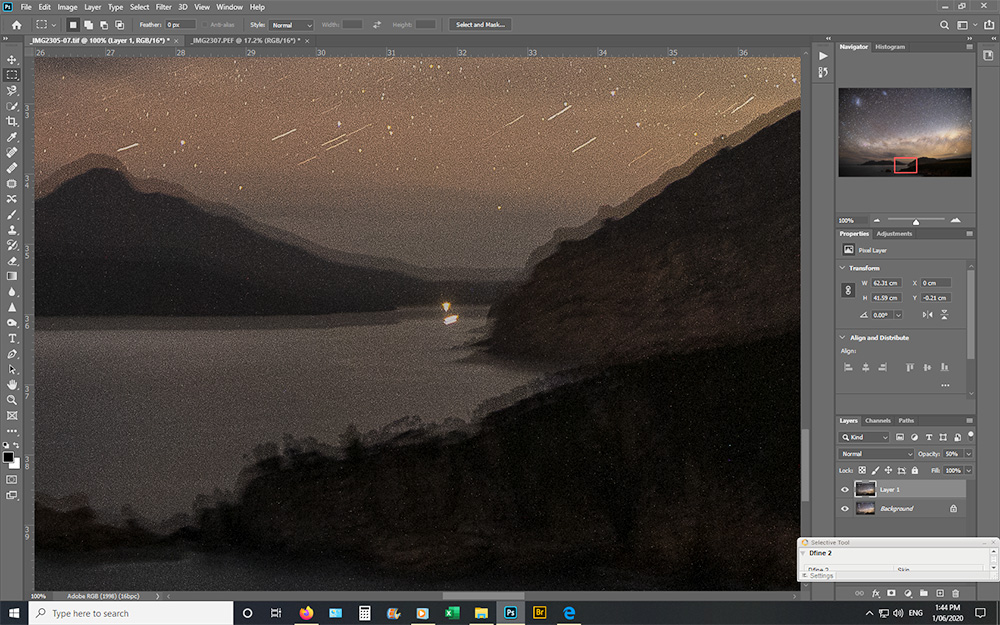
Realign layer 1 so the straight horizon covers the blurred one.
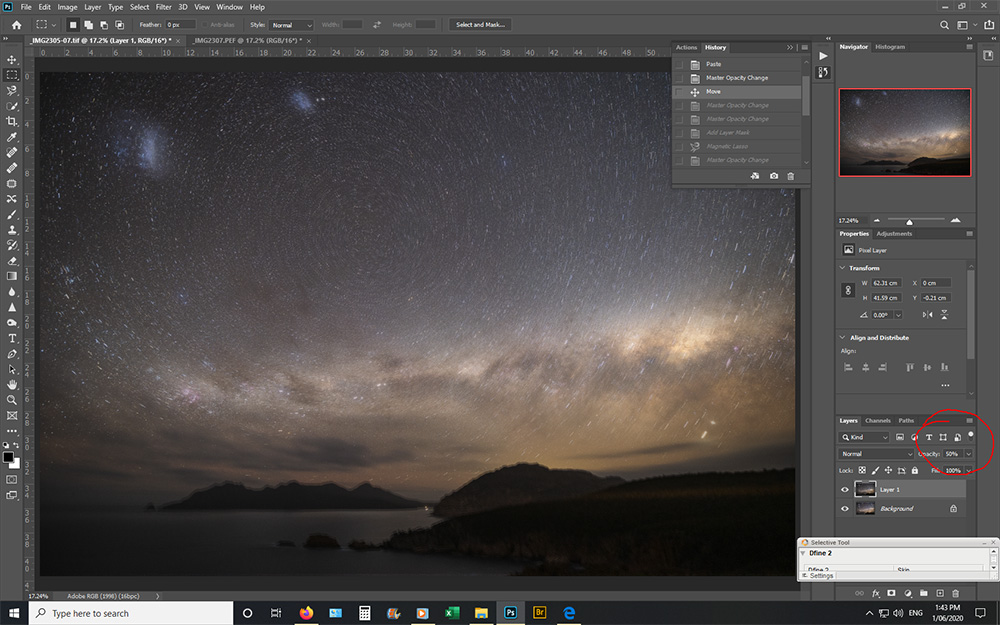
Step 2: Copy and paste your star trail image over the still star image, and adjust the opacity to 50. Zoom in to 100% so you can see the fuzzy horizon underneath and push Layer 1 up so that the straight horizon covers the fuzziness of the background horizon. Return the opacity to 100% on Layer 1 at this point.
Close up
Step 3: Use the lasso (magnetic seems to work well) or Quick Selection Tool to outline the bottom part of the photo ie everything under the nice straight horizon line; then click on the “Select and Mask” button up the top.

Magnetic lasso works well as it “sticks” to the sharp line of the horizon
Step 4: Fiddle with the radius and contrast to your liking. Radius of 100 and contrast of 50 seems to work well. Hit OK.
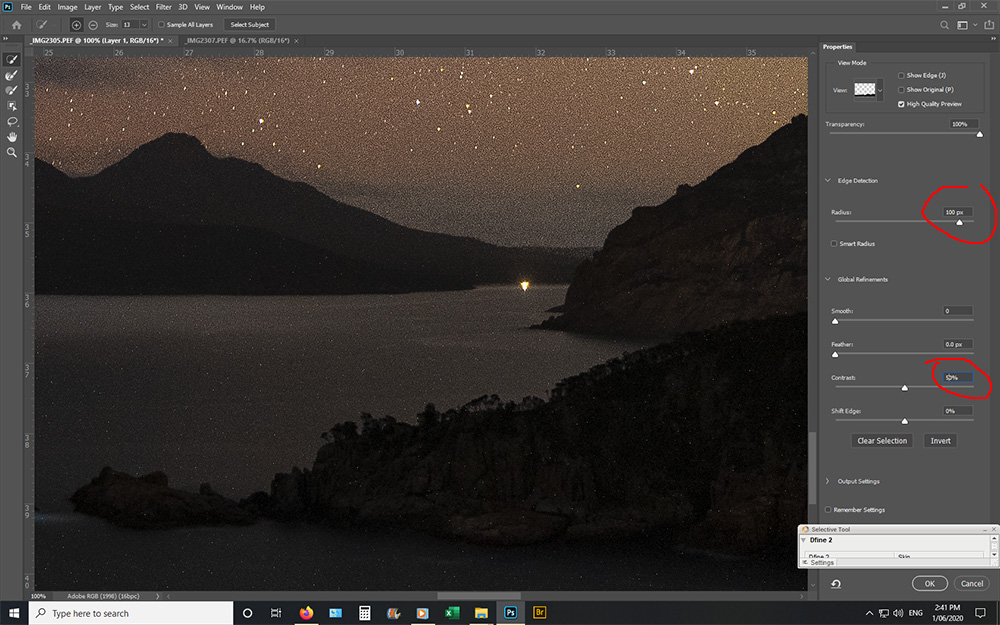
Step 4 “Select & Mask” screen
Step 5: Hit the layer mask button, and voila! You can then flatten the image down and edit as usual (ie contrast, whites etc).
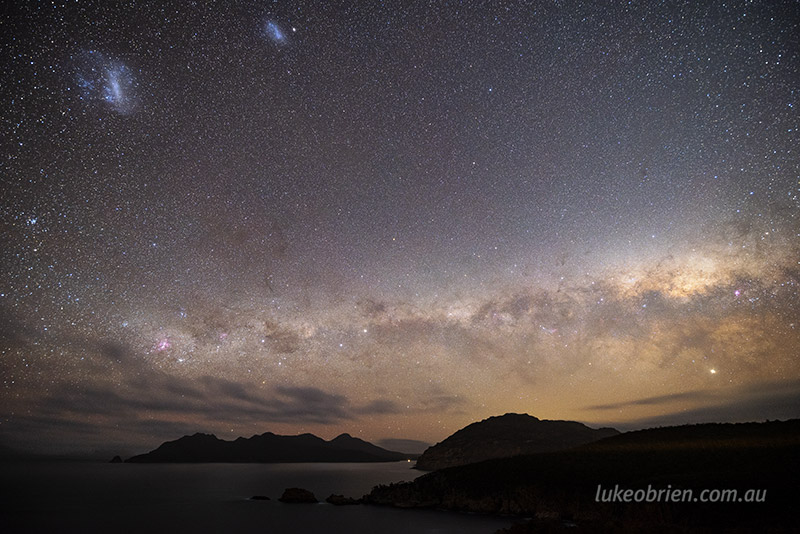
The finished product 🙂
I am posting this prety much for my own benefit as much as anyone elses as I realise not many people use Pentax these days, and I could not find this info anywhere online. So if you use Pentax cameras or know anyone who does, feel free to point them in this direction 🙂