Camera Settings for Photographing the Aurora
The final installment of my aurora chasing tips is all about the night of the big shoot. As discussed in part 1 a tripod is a must as is a reasonably wide angle lens.

“Typical” camera settings for photographing the aurora – high ISO eg 3200; long shutter speed eg 20 seconds and wide open aperture eg f2.8
If you are new to manual camera settings it can seem quite daunting but the settings and technique can be summed up quite simply. The camera must be used in “M” (manual) mode meaning you will select the aperture and shutter speed yourself. You will also select ISO yourself too.
Every aurora is different in terms of brightness and activeness. When the aurora is weak and barely there you will need different settings to when the aurora is pumping and clearly visible to the naked eye.
Weak Aurora Camera Settings
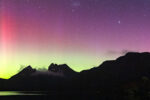
If the aurora is barely there (ie invisible to the naked eye) you are likely to need to crank the ISO to 6400 or higher. Your exposure settings would be wide open aperture (ie f2.8 or the lowest f-number your lens can achieve) along with a shutter speed which could be a full 30 seconds. These shots aren’t usually terribly rewarding, but they still count as a successful chase!
Example of a “weak” aurora. Camera settings were ISO 6400, f2.8 and 25 second shutter
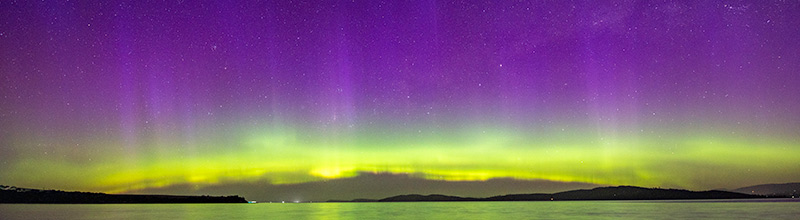
Strong Aurora Camera Settings
If the aurora is very bright, active and easily visible to the naked eye you could bring the ISO right down as low as 400-800 while keeping the aperture wide open (ie low f-number such as 2.8~4). You could shorten your shutter speed too in this case to 10 seconds or less – always dependent of course on just how bright the aurora actually is.
A good staring point for settings could be: ISO3200; Aperture f2.8-4; 20 second shutter speed. Adjust based on results.
Focus Technique
Because it is so dark, auto focus is not an option. Instead you will need to manually focus on one of the stars. The best way to achieve this is by finding a bright star in your field of view and magnifying the view of it in Live View mode. As you adjust the focus manually the star will change from soft and fuzzy when it is out of focus to a sharp, pin-prick of light when it is in focus. You then fire the shutter as usual.
One last bit of advice here – use the 2 second delay/timer, so you are not physically touching the camera/tripod when it takes the shot.
High ISO Noise Reduction
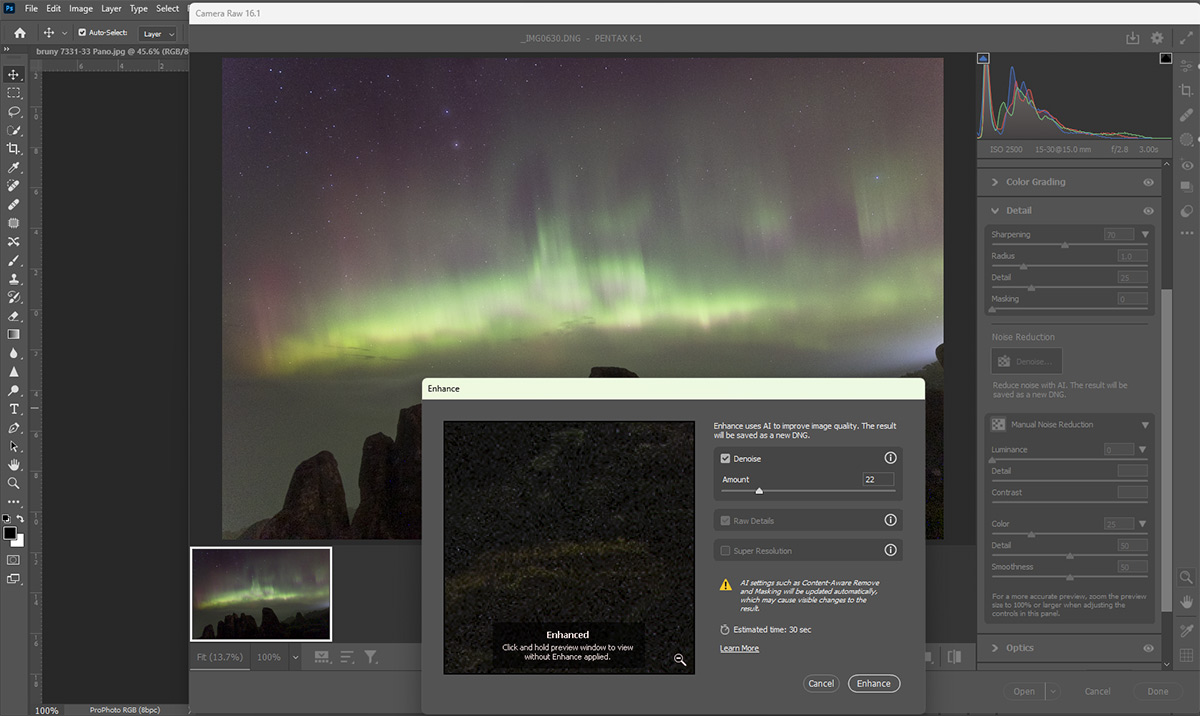
Nose reduction in the latest Photoshop/Camera Raw software
Recently noise reduction software has taken a huge leap forward. Adobe in particular now use AI to create a new RAW file with the noise mostly eliminated with very impressive results. This has the potential to really change shooting technique – I am tempted next time to shoot at very high ISO (eg 10000+) and an extremely short shutter speed such as 1 second which should result in quite interesting images 🙂
*******
This is the last post in this series, so thank you for reading along. I hope this info helps the novice aurora chaser.
I run regular tours and workshops which often include night sky & aurora. You can also book a one on one session at night too.
Contact me to discuss the options.